Enable shell scripts for the JetBrains Toolbox App

The JetBrains Toolbox App makes it easy to install JetBrain products and keep them updated. One caveat of using the Toolbox App, is that your shell scripts might not work anymore. Luckily, there's a two-step process to configure the Jetbrains Toolbox App to work with your shell scripts.
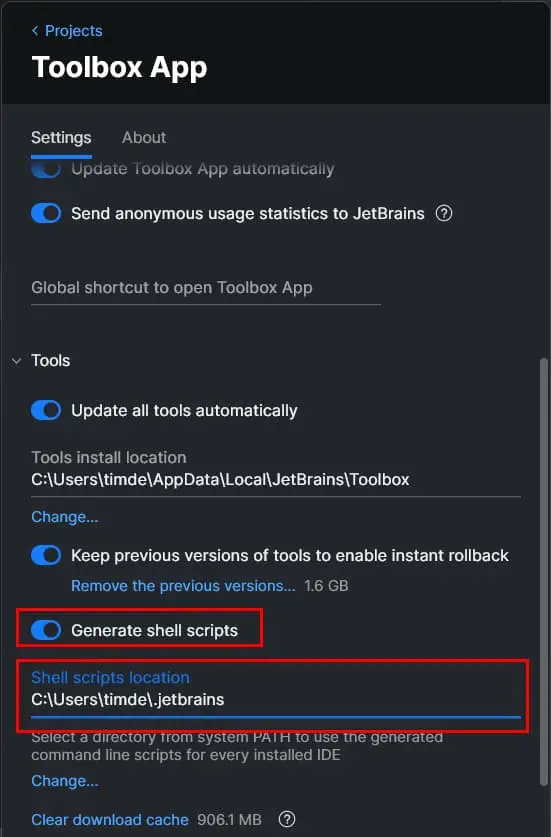
As a workaround, open up the JetBrains Toolbox App Settings, enable the "generate shell scripts" option and set the "Shell scripts location" to a folder of your choice.
For reference, I created a .jetbrains folder within my user folder.

You can check if everything went well by opening the specified folder. It should contain all the JetBrains products.

Lastly, create a new PATH environment variable and point it to the same folder.
Restart your shell and you should be able to open the JetBrains IDEs from the command line.
As a bonus, you can also rename the shell scripts to custom names.
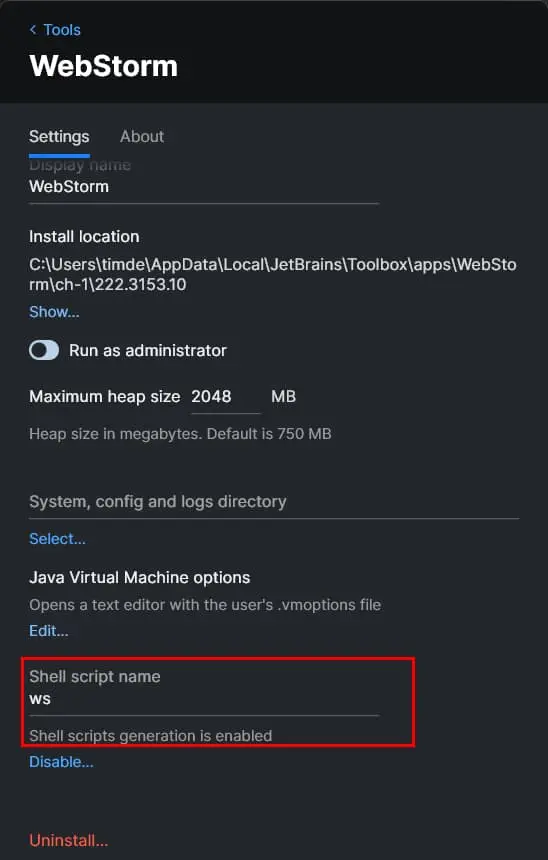
For example, I've configured WebStorm to start with the ws command.
To do this, go to the settings of the tool, scroll to the bottom, and rename the shell script name.

Feel free to update this blog post on GitHub, thanks in advance!
Join My Newsletter (WIP)
Join my weekly newsletter to receive my latest blog posts and bits, directly in your inbox.
Support me
I appreciate it if you would support me if have you enjoyed this post and found it useful, thank you in advance.
